Wednesday, August 4, 2010
Maker Faire 2010 Detroit
We have returned from the motor city. We had an amazing time seeing and meeting creators from all different fields and the inventions they brought. It was also a lot of fun to show the 22,000 people that came what we have been working on for the past 6 months.
Photos from the trip:
http://www.flickr.com/photos/16925188@N06/sets/72157624513937961/
Photos from the trip:
http://www.flickr.com/photos/16925188@N06/sets/72157624513937961/
Tuesday, July 27, 2010
Dry Erase Drawings
Tuesday, July 13, 2010
Troit WHAT!!!
Maker Faire Detroit 2010 is a faire for Makers. We made something so we are going. Check out the promo video they put out. On the 0:19 - 0:20 (an entire second) you can see our machine printing some goodness!
Thursday, July 1, 2010
Thursday, June 24, 2010
Dots Dots and More Dots
Tuesday, June 22, 2010
Saturday, June 19, 2010
Friday, June 18, 2010
Takeoff!
There have been about 4 or 5 moments when Nick and I have given each other a high five after doing something with this machine... and this was one of those. The first successful 2.5 axis vector plot. We had a couple more kinks to work out, but a $5 run to the hardware store and 15-min of work were all it took.
After the plane we moved on to a new drawing. We wanted to do a drawing that only the machine could do and not a skilled human with an airbrush. Well... maybe someone else could do it, but it would be difficult.
Thursday, June 3, 2010
Wednesday, June 2, 2010
Tuesday, May 18, 2010
Thursday, April 29, 2010
What everyone has always wanted... a machine to paint smiley faces.
Our machine reads (code) at a first grade level. You can kind of tell what it is trying to do, but it's pretty sloppy. Many things need changing, but it is just fine tuning. Each drawing should get successively better from here on.
What it painted.
and finally, the setup.
Wednesday, April 28, 2010
Go go gadget CNC AIRBRUSH!
Trying out one of the more exciting of all the possible z-axis mounts.
Soon we will attach this to the rest of the machine and have some
real fun.
Wednesday, April 21, 2010
All 3 axes working (mostly)
You fix a problem... you find a problem. This seems to be the
way this whole project has gone. All three axes work, but now
we can see that the x axis is skipping steps and the y axis is
snagging, causing it to jump.
Along with the list of things to do is create a rig that can hold
an airbrush so that we can spray paint on any surface.
Saturday, April 17, 2010
Z-axis control
Using an 8 foot brake cable line from Sunflower Outdoor as a remotely located motor control, testing its ability to maintain strength through bends and in directional transfers. This may be the last piece towards full functionality. Now we can simply build several 'media heads' that attach to the y-sled and each are dedicated to a specific media type ie airbrush, dry erase marker, chalk, etc.
Thursday, April 15, 2010
Monday, April 12, 2010
Work Continues
The machine gets better every time we work on it. A small tweak here and there, making sure nothing will break later on. Most the work recently has been moving the Z axis motor from the Y axis sled to the X axis sled (I think Nick and I have developed our own language to describe the project). The good news is that two potential clients have proposed projects for our machine. We will see where those lead too.....
Friday, April 2, 2010
A "Dry" Run (dry erase)
With the X and Y axes mostly completed, it was time for our first test. The Z axis that controls the moving of the pen off the board was not yet installed. Hopefully we will have that running soon. There is also a large amount of fine tuning to be done, but this big step keeps us motivated.
Saturday, March 27, 2010
Atleast it looks cool.
We completed our first test of the entire assembly. The x and z axes are working great but the y axis is horrible. First, it would only go down, then when we got it to go up it would sometimes slip. Once we got those problems fixed, we realized that when the sled would move up and then down and then back up, to what should have been the exact same position, it was about 5% lower than the origin point. We think we have a solution, but only the next test will tell.
First Full Assembly Test from tim williams on Vimeo.
Thursday, March 25, 2010
BOOM!
This is the first test with the x axis and y axis working. It has 2 problems.
1) Its lying on the floor (because we haven't build the legs yet).
2) The little Y axis sled can only go in one direction right now because of a.... mmm.. I'm going to call it a technical issue.
The writing's on the ground. from tim williams on Vimeo.
1) Its lying on the floor (because we haven't build the legs yet).
2) The little Y axis sled can only go in one direction right now because of a.... mmm.. I'm going to call it a technical issue.
The writing's on the ground. from tim williams on Vimeo.
machine draw lines good
.jpg)
It draws about as well as I construct sentences, all not good like. I also just couldn't come up with a name for this post. It is by no means a "first test" because this was just a marker stuck to the sled with tape and glitches. Work continues to improve on this thing. .jpg)
.jpg)
p.s. Why is it so ridiculously difficult to format the text around these photos!?!? A simple text wrap is all I want.
Sunday, March 21, 2010
Saturday, March 13, 2010
Sqwiggle Maker
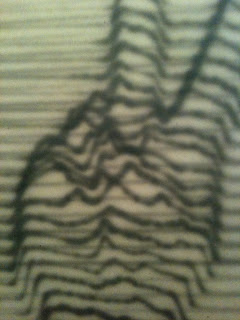
The question, "so what are you going to do with the machine?" keeps coming up. Doing our best impression of Lost season 6, we will now begin to answer this question for all our fans (are there any?) and ourselves. Heres what I call SqwiggleMaker 1.0. It takes images and converts them into horizontal sqwiggles directly corresponding to the grey scale of the image.
Wednesday, March 10, 2010
Babies First Step
Babies First Steps from tim williams on Vimeo.
The x-axis is complete(with the exception of a couple tweaks). Heres the very first movements of the sled as it moves along our short track. Maybe we will have an image created by it soon!
Axis Completed from tim williams on Vimeo.
Friday, March 5, 2010
1 more step
We keep making small steps towards completion which is the only way to imagine finishing it. Otherwise, theres so many steps involved that it becomes overwhelming.
x-axis magic from tim williams on Vimeo.
x-axis magic from tim williams on Vimeo.
Tuesday, March 2, 2010
Construction of Moving Parts
Above is a shot of the digital model showing how the vertical Y-axis slides along the horizontal X-Axis. From there, a "sled" will climb up and down the Y-Axis painting a pretty picture, most likely of rainbows and sunshine. Below shows how we design this stuff. You can see the X-axis we have already made with a piece of trace paper on top of it where we are literally drawing our next step.
Thursday, February 25, 2010
Tuesday, February 23, 2010
Monday, February 22, 2010
X-Axis motor success!
We just completed the first successful test of the system and everything is working great. We will be painting on walls in no time.
X-Axis Stepper Motor Success. from tim williams on Vimeo.
X-Axis Stepper Motor Success. from tim williams on Vimeo.
We done broked it good!
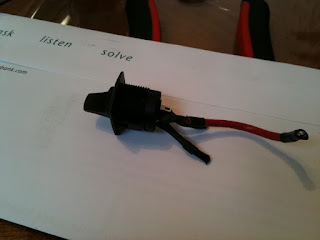
While finishing up the wiring for the control box, we miss wired the on/off switch and then broke it in the act of fixing the wiring. Luckily radioshack carries a lovely collection of switches!
The next day our Transformer arrived in the mail and we were able to finish the wiring of the control box(with new on/off switch). We plan to try our first motor test this week. Hopefully a video showing a successful test run will be up in a couple days.
Sunday, February 14, 2010
Constructing a case
Constructing the case is a microcosm of what 183 CANVAS is about. Rather than taking the obvious and known route of building a wood box to hold our electronics, we went the unknown route.
After googleing the melting point of acrylic versus wood, we realized that we could easily melt our acrylic in the oven (325 degree melting point). From there we shaped it into our nice electronics holder.
After googleing the melting point of acrylic versus wood, we realized that we could easily melt our acrylic in the oven (325 degree melting point). From there we shaped it into our nice electronics holder.
Monday, February 8, 2010
Solderin'
The Hobby CNC kit has arrived and we have finished assembling most of it. Taking extra time to be as careful as possible, because our wiring experience is quite limited.
The most impressive part of the kit was the three 305 oz-in Stepper motors. They feel so dense that you can just tell they are ready to release some power.
The most impressive part of the kit was the three 305 oz-in Stepper motors. They feel so dense that you can just tell they are ready to release some power.
Saturday, February 6, 2010
Thursday, February 4, 2010
Subscribe to:
Comments (Atom)


.jpg)


.jpg)

.jpg)
.jpg)
.jpg)
.jpg)


